Channel Letter Sign Installation: The Step-by-Step Guide From Design to Lights-On
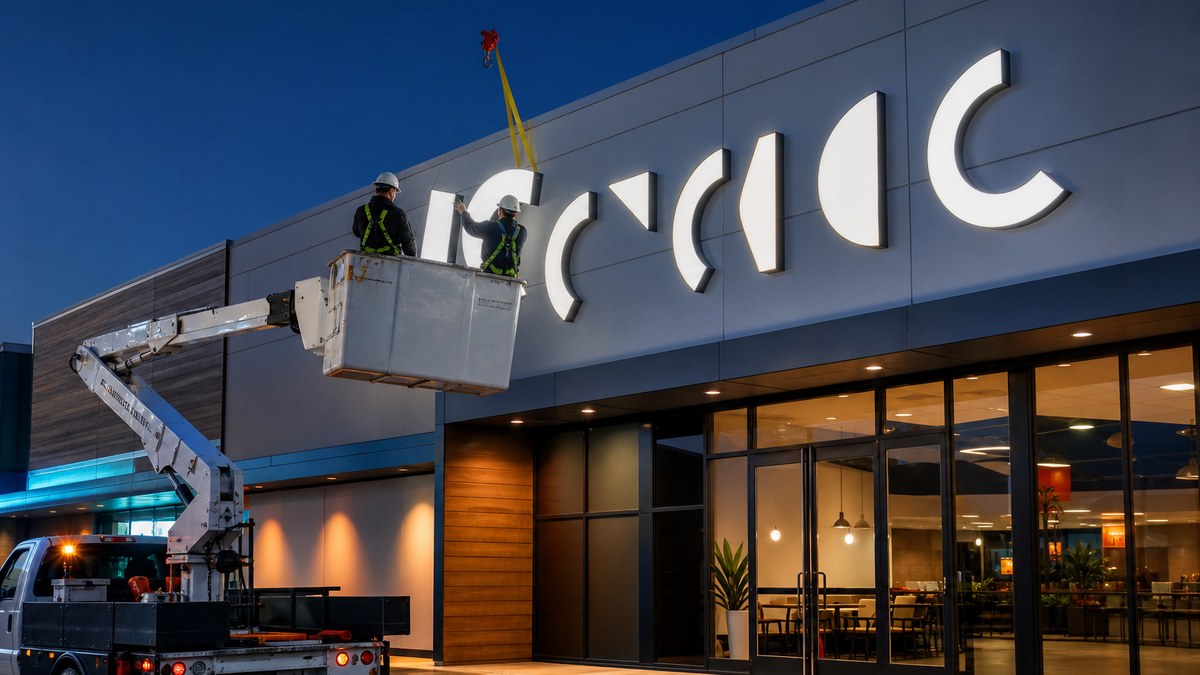
Channel letter sign installation is the process of surveying your facade, getting the design approved by your landlord and city, fabricating illuminated LED letters, mounting them to the wall on a raceway or directly, and connecting them to a dedicated sign circuit. Done right, most projects take 6 to 10 weeks from first measurement to lights-on, and the install day itself usually takes just one day.
Most business owners only see the last step: a bucket truck shows up, a crew spends a few hours on the wall, and that evening the storefront glows. Everything that makes that day go smoothly happens weeks earlier. This guide walks through every phase of a channel letter sign project — site survey, landlord criteria, permits, fabrication, mounting methods, electrical, inspection and aftercare — so you know what to expect, what to ask, and where projects usually get delayed.
Whether you are opening your first location or rolling out letters across dozens of storefronts, the same sequence applies. The details change by city, by landlord and by wall type. The order does not.
Channel letter installation follows seven phases. Here is what a typical commercial project looks like:
- Total timeline: 6–10 weeks from survey to lights-on (12–16 weeks if permits or redesigns stall)
- Design + landlord approval: 1–2 weeks design, 1–3 weeks landlord review
- City sign permit: 2–4 weeks in most US cities, longer in strict jurisdictions
- Fabrication: 2–3 weeks of shop time, often run in parallel with permitting
- Install day: usually 1 day (4–8 hours on the wall for a standard storefront)
- Code basics: UL 48 listed sign, NEC Article 600 wiring, 20-amp dedicated sign circuit, disconnect within sight of the sign
- Mounting options: raceway, wireway, or flush (direct) mount — landlord criteria usually decide
What a channel letter installation actually includes
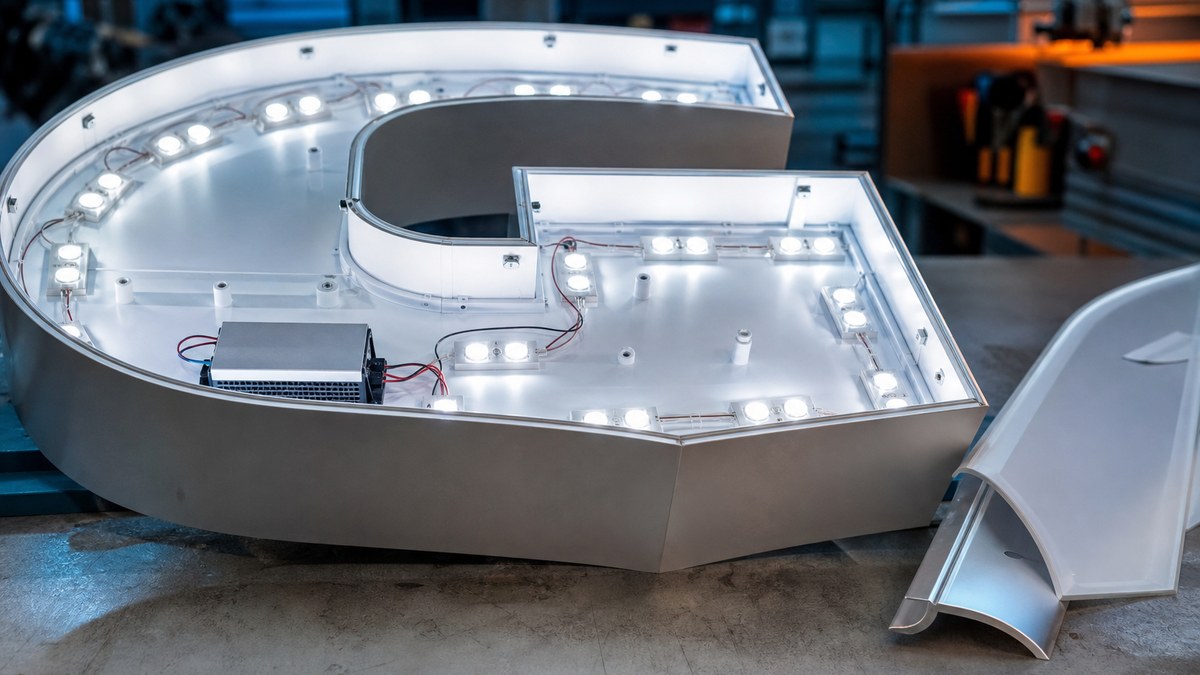
A channel letter is a three-dimensional letter built from aluminum sides (called returns), a back, and a translucent acrylic face. LED modules mounted inside light the face from behind, or light the wall behind the letter for a halo effect. Each letter is its own small, sealed light box.
"Installation" sounds like a single step, but professionally it covers everything that turns a drawing into a working, legal, inspected sign. That includes measuring the facade, locating structure and power behind the wall, producing permit drawings, building the letters, making the wall penetrations, mounting, wiring, sealing, testing and passing the electrical inspection.
If you are still choosing a style, read our comparisons of channel letters vs box signs and halo-lit vs front-lit channel letters first. The illumination style you pick changes how the letters mount, so it is worth deciding early.
The channel letter installation timeline
Here is the typical sequence, phase by phase. Some steps overlap, which is how good projects stay near the short end of the range.
| Phase | What Happens | Typical Duration | Who Signs Off |
|---|---|---|---|
| 1. Site survey | Measure sign band, check wall type, find power and access | 1–3 days | Sign company |
| 2. Design & proofs | Scaled renderings, letter heights, colors, illumination | 1–2 weeks | You (the business owner) |
| 3. Landlord approval | Design checked against center sign criteria | 1–3 weeks | Property manager / HOA |
| 4. City sign permit | Zoning + electrical review of permit drawings | 2–4 weeks | City or county |
| 5. Fabrication | Cut returns, build letters, install LEDs, UL label | 2–3 weeks | Shop QC |
| 6. Installation | Mount, wire, seal, test | 1 day | Install crew |
| 7. Final inspection | Electrical and/or building inspection | 1–10 days | City inspector |
Permit timing varies more than any other phase. Some cities approve simple wall signs over the counter, while others route every sign through design review boards. Our sign permit timelines by state guide breaks down what to expect in major markets.
Ask your sign company to start fabrication once the landlord approves and the permit is submitted, not after the permit is issued. On straightforward wall signs this overlap can save 2–4 weeks. The small risk is a city-requested change, which is why it only makes sense once the design already meets local code.
Phase 1: Site survey
Every good installation starts with a survey. A technician visits the storefront (or works from detailed photos and drawings for remote sites) and records the facts that drive design and engineering.
- Sign band dimensions: the usable height and width of the wall area where letters can go
- Wall construction: EIFS/stucco, brick, block, metal panel, wood or glass — each needs different anchors
- What is behind the wall: framing, parapet, roof access, or an interior ceiling space for wiring
- Power location: whether a sign circuit already exists and where the junction box is
- Access: height, landscaping, sidewalks, overhead lines and whether a bucket truck or lift can reach
- Viewing distance: how far away drivers and pedestrians will read the sign, which sets letter height
Letter height follows a simple rule of thumb: about 1 inch of letter height for every 10 feet of viewing distance for best impact, with roughly 1 inch per 30–40 feet as the outer limit of legibility. A storefront read from a parking lot 200 feet away usually needs letters in the 18–24 inch range. A shopping center facing a highway may need far more.
Phase 2: Design and proofs
Design turns your logo and the survey into scaled drawings. A good proof shows the sign on a photo of your actual building, with exact letter heights, overall length, return depth, face and return colors, trim cap color, illumination type and mounting method.
Key design decisions
- Illumination: front-lit, halo-lit (reverse-lit), combination front-and-halo, or non-illuminated
- Return depth: commonly 3–5 inches for front-lit letters; halo-lit letters stand off the wall on spacers
- Face material: translucent acrylic or polycarbonate, often with vinyl overlays to match brand colors
- LED color temperature: white faces typically use 6500K for crisp brightness; colored faces may use matching-color LEDs
- Logo treatment: logos are often built as a separate cabinet or a cut-out shape alongside the letters
This is also when the sign company confirms the design works for the permit. Many cities cap wall sign area as a percentage of the facade or by linear frontage. Catching that in the proof stage avoids a costly redesign later.
Phase 3: Landlord sign criteria approval
If you lease space in a shopping center, office park or mixed-use building, your lease almost certainly references a sign criteria document. It is the landlord's rulebook, and the city will often not accept a permit application without the landlord's signed approval.
Typical sign criteria cover:
- Maximum letter height (often in the 18–36 inch range) and maximum sign length, frequently 70–80% of your frontage
- Required mounting method — most centers require a raceway to limit wall damage
- Approved face colors, return colors and trim cap colors for a uniform look
- Allowed illumination types and, sometimes, required on/off hours via a timer
- Exact placement: centered on your storefront, within the sign band, with clearances from neighbors
- Insurance certificates and licensed contractor requirements for anyone working on the building
Plan on 1–3 weeks for a compliant design. Every resubmission adds time, so the fastest path is to request the criteria document on day one and design to it. Large multi-location brands deal with dozens of different criteria at once — see our guide to multi-location brand rollouts for how to manage that.
Landlords and inspectors increasingly ask for a sign that is UL listed as a complete assembly, not just a sign built with UL-recognized parts. A UL 48 label on each letter or section tells the inspector the finished sign was built to the electric sign safety standard.
Phase 4: City sign permits
Nearly every US city requires a permit for an illuminated wall sign. Many require two: a sign (zoning or building) permit and an electrical permit. The permit package usually includes:
- A site plan showing the building and sign location
- An elevation drawing of the facade with sign dimensions and area calculations
- Letter construction details and mounting/attachment details
- Electrical information, including the UL listing and power requirements
- Landlord authorization and the contractor's license and insurance
Most cities issue wall sign permits in 2–4 weeks. Historic districts, design-review cities and coastal areas with strict wind requirements can take longer. Projects in Boston and greater Massachusetts, Washington DC and parts of Los Angeles often see extra review layers, while many Texas suburbs move faster. If you are installing in North Texas, our Dallas sign team handles permits across the Metroplex, including Plano and Frisco.
Design, permits, fabrication and installation — one team
We survey your storefront, design to your landlord's criteria, pull the permits, build UL-listed LED channel letters and install them. Tell us about your location and get a free, no-obligation quote.
Phase 5: Fabrication
Once the design is locked, the letters are built. Expect 2–3 weeks of shop time for a standard set, longer for large or complex orders. Fabrication generally follows these steps:
- Backs and faces are cut from aluminum and acrylic on a CNC router using the approved artwork.
- Returns are formed by a channel letter bender that shapes aluminum coil around each letter's outline.
- Letters are assembled and painted, with the inside painted bright white to reflect light evenly.
- LED modules are installed in a pattern that avoids hot spots, wired to a low-voltage power supply.
- Drain (weep) holes are added so moisture can escape, and the letter is sealed.
- Each letter is lit and tested, then UL labeled and packed with a mounting pattern.
The mounting pattern is a full-size paper template of the whole sign. On install day the crew tapes it to the wall to mark every stud hole and wire penetration exactly where the drawings say. It is one of the simplest tools in signage, and it is the reason good installs come out straight and centered.
Why LED matters for installation
Modern channel letters use LED modules instead of neon. Quality LED modules are rated for roughly 50,000 hours or more, run on low-voltage power supplies, and draw a fraction of neon's power. For installation, that means lighter letters, smaller power supplies that fit inside a raceway, and simpler, safer wiring. It also makes service easier later — our commercial LED sign maintenance guide covers what to expect over the sign's life.
Mounting methods: raceway vs wireway vs flush mount
How the letters attach to your building is the biggest install-day decision. There are three main methods, and in leased space your landlord's criteria often make the choice for you.
| Method | How It Works | Wall Penetrations | Best For |
|---|---|---|---|
| Raceway | Letters mount to a painted aluminum box that holds wiring and power supplies | Few (raceway anchors + 1 power feed) | Shopping centers, leased space, frequent tenant turnover |
| Wireway | Slim channel hides wiring only; power supplies sit inside the building | Few to moderate | Tight projection limits, cleaner look than a raceway |
| Flush / direct mount | Each letter bolts to the wall; wiring passes through to the interior | Many (per letter) | Owned buildings, premium facades, halo-lit letters |
| Backer panel | Letters mount to a painted panel that attaches to the facade | Few (panel anchors) | Uneven walls, brick, contrast backgrounds |
Raceway mounting
A raceway is a narrow aluminum box, painted to match the wall, that runs behind the letters. Letters attach to the raceway, the power supplies live inside it, and only a few anchors plus one electrical feed go into the building. Removal is simple when a tenant leaves, which is why most shopping centers require it. The trade-off is that the raceway stays visible, so color-matching it to the facade matters.
Wireway mounting
A wireway is a slimmer cousin of the raceway. It carries the wiring but not the power supplies, which are mounted inside the building. The result is a lower profile and a cleaner look, which helps where codes limit how far a sign can project from the wall.
Flush (direct) mounting
Flush mounting attaches each letter directly to the wall on threaded studs, with wiring running through the wall behind each letter. It gives the cleanest appearance and is the standard for halo-lit letters on spacers. It also means more wall penetrations, more time on the wall, and interior access to the space behind the sign band. It is most common on buildings the business owns.
On EIFS (synthetic stucco), every penetration must be sealed properly or water gets behind the foam and causes hidden damage. Ask your installer how they seal EIFS penetrations and whether they use sleeves or spacers to avoid crushing the foam when tightening studs.
Electrical requirements: NEC Article 600 basics
Illuminated channel letters are electrical equipment, and the National Electrical Code treats them that way. Article 600 of the NEC covers electric signs. The essentials every owner should know:
- Listed signs (NEC 600.3): electric signs must be listed and installed according to their listing — for channel letters that usually means UL 48.
- Sign outlet (NEC 600.5): commercial buildings with pedestrian-accessible tenant entrances must provide at least one dedicated 20-amp branch circuit for sign use at each tenant entrance.
- Disconnect (NEC 600.6): each sign circuit needs a disconnecting means that opens all ungrounded conductors and is within sight of the sign (generally within 50 feet), or a breaker that can be locked off.
- Grounding and bonding (NEC 600.7): metal parts of the sign must be bonded to the equipment grounding system.
- Continuous load: sign circuits are treated as continuous loads, so they are sized with extra headroom.
In practice, the electrical scope depends on what your building already has. Many newer retail spaces already have a sign circuit stubbed to a junction box in the sign band, often controlled by a timer or photocell. Older buildings may need a new circuit pulled from the panel. Your local adopted code edition and inspector make the final call, which is why a licensed electrician handles the connection.
A photocell or astronomical timer is the easiest way to control channel letters. It turns the sign on at dusk and off at a set time, which saves energy, extends LED life, and helps you comply with any landlord or city hours of operation.
Phase 6: Installation day, step by step
Install day is usually the shortest phase. A typical storefront set goes up in 4–8 hours with a two- or three-person crew and a bucket truck or lift. Here is what happens:
- Site setup: the crew cones off the work area, positions the lift and confirms the permit is posted or on hand.
- Layout: the paper pattern is leveled, centered and taped to the wall; hole locations are marked.
- Drilling: holes are drilled for studs or raceway anchors and for the electrical penetration.
- Mounting: the raceway or letters are lifted into place and secured with anchors suited to the wall type.
- Wiring: letters are connected to power supplies, and the sign is connected to the dedicated circuit through the disconnect.
- Sealing: every penetration is sealed against water; weep holes are checked to make sure they face down and are clear.
- Testing: the sign is powered, every letter is checked for even light, and the timer or photocell is set.
- Cleanup and walkthrough: protective film is removed, the area is cleaned, and you get a walkthrough of controls.
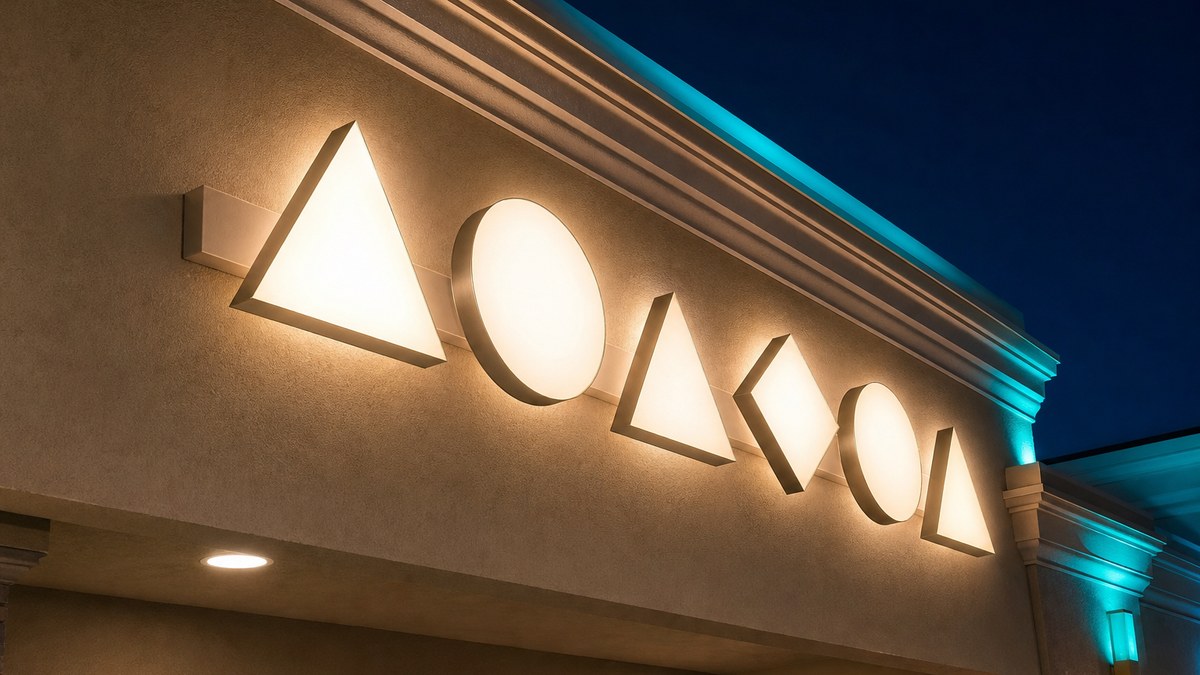
Weather can push an install day. Crews generally will not work in high wind, lightning or heavy rain, and sealants need dry surfaces. In hot climates like Phoenix and Las Vegas, summer installs often start at dawn to finish before the afternoon heat.
Phase 7: Final inspection and sign-off
Most cities require a final inspection after installation. The inspector typically checks that the sign matches the approved permit drawings (size, location, height), that the UL label is present, that the disconnect is in place and correctly located, and that wiring and bonding meet code. Some jurisdictions inspect the electrical connection before the sign is energized; others allow you to light it and inspect afterward.
Once the inspection passes, the permit is closed. Keep a copy of the final permit and inspection record with your lease documents — landlords and future buyers sometimes ask for it, and it simplifies any future sign change.
What delays channel letter projects (and how to avoid them)
When a project runs long, it is rarely the install. It is almost always the paperwork or the building. The most common causes:
1. Designing before reading the sign criteria
A design that breaks the landlord's rules gets sent back, and every round adds a week or more. Get the criteria first and design to it.
2. Incomplete permit applications
Missing landlord signatures, unclear sign-area math or missing attachment details trigger correction requests. An experienced sign company submits a complete package the first time.
3. No power at the sign band
If the building has no sign circuit, an electrician needs to pull one. Finding this during the survey rather than on install day keeps the schedule intact.
4. Access problems
Covered walkways, landscaping, steep grades or overhead lines can block a bucket truck. Some sites need a scissor lift, scaffolding or a crane, which should be planned in advance.
5. Late design changes
Changing colors, wording or size after the permit is submitted can restart the approval clock. Lock the design before submission.
If you have a hard opening date, work backward. For a typical storefront, sign the proposal at least 10–12 weeks before opening. If time is short, ask about a temporary banner permit so the storefront is identified while permanent letters are in production.
After installation: keeping letters bright
Quality LED channel letters need little attention, but a few habits keep them looking new. Check the sign monthly at night for dark letters or uneven sections. Keep weep holes clear of debris and insect nests. Clean faces once or twice a year with mild soap and water, never solvents that can craze acrylic. And make sure the timer or photocell is still set correctly after power outages and daylight saving changes.
When something does go dark, it is usually a power supply or a single LED string rather than the whole sign. Our sign repair and maintenance team handles these quickly, and our repair vs replace guide explains when an older sign is worth fixing. For a look at long-term ownership factors, see the true cost of LED sign ownership.
How to choose a channel letter installer
The installer you pick determines whether this is a smooth 6-week project or a frustrating 4-month one. Ask these questions before you sign:
- Do you handle landlord approval and permits? A full-service company manages the paperwork, not just the install.
- Are the letters UL listed? Ask to see where the UL 48 label goes on the finished sign.
- Who does the electrical connection? Confirm a licensed electrician makes the final connection where required.
- What mounting method do you recommend and why? The answer should reference your wall type and landlord criteria.
- Are you licensed and insured in my city? Many cities and landlords require proof before work starts.
- What warranty comes with the sign? Look for multi-year warranties on LEDs, power supplies and workmanship, backed by UL-listed components.
- Can you show similar work? Browse our project gallery for examples across many building types.
American LED Signage installs channel letters nationwide, from Houston and Chicago to Philadelphia, Portland, San Jose and New York. See all service locations or our full list of sign services.
The bottom line
Channel letter sign installation is a one-day job built on six weeks of preparation. The survey sets the size, the landlord sets the rules, the city sets the timeline, the shop builds the quality, and the crew makes it look effortless. When each phase is handled by people who do it every day, you get letters that go up straight, pass inspection the first time and light your storefront for years.
Start early, get your landlord's sign criteria on day one, confirm the power situation during the survey, and work with a company that owns the whole process. That is the shortest path from idea to lights-on.
Frequently Asked Questions
How long does channel letter sign installation take?
Do I need a permit to install channel letter signs?
What is the difference between raceway and flush mount channel letters?
Why does my landlord require a raceway?
What electrical service do channel letters need?
Do channel letter signs need to be UL listed?
How big should my channel letters be?
Can channel letters be installed on brick or stucco?
What affects the cost of channel letter installation?
Can I reuse an existing raceway for new channel letters?
Get your channel letters designed, permitted and installed
UL-listed LED channel letters with multi-year warranties, landlord-criteria design, full permit handling and professional installation in all 50 states. Call or request your free quote today.
American LED Signage is part of a network of commercial lighting and signage specialists. For projects beyond signage, see our partner sites: Dallas commercial LED, Fort Worth LED lighting, Arlington LED specialists, Plano commercial LED, Irving LED installations, statewide Texas LED lighting, wholesale LED components, American Starlight Ceilings for premium interior fiber optic ceilings, fiber optic lighting systems, modular building solutions, and modular structures in Dallas.